
Prevent Dog Paw Pad Injuries: A Hunter's Guide
Table of Contents
- Why Paw Pad Injuries Are the #1 Threat to Hunting Dogs
- Step 1: Start with Toenail Maintenance and Trimming
- Step 2: Build Toughness Through Hunting Dog Paw Pad Conditioning
- Step 3: Protect Paws with Balms and Booties
- Step 4: Inspect and Clean Paws Before and After Every Hunt
- Step 5: How to Heal Torn Dog Paw Pads in the Field
- Step 6: Manage Weight and Monitor Gait for Injury Prevention
- Terrain-Specific Injury Profiles and Prevention Strategies
Last Updated: August 18, 2026
Why Paw Pad Injuries Are the #1 Threat to Hunting Dogs
Paw pad injuries are the leading cause of field retirement for hunting dogs. According to American Kennel Club guidelines on hunting dog paw health, split pads and torn footpads force more dogs off the hunt than any other preventable injury. In a study of traumatic pad injuries, 68% of dogs presented with lacerations to a front footpad, and dogs with full-thickness pad lacerations were 7.27 times more likely to suffer major complications.

Most of these injuries are entirely avoidable with the right conditioning, maintenance, and field protocols. This guide walks you through the exact steps to prevent dog paw pad injuries, from nail care to emergency field repair, so your dog finishes the season strong.
Step 1: Start with Toenail Maintenance and Trimming
Long nails alter your dog's gait, increase slipping on hard ground, and are far more prone to snagging, chipping, splitting, or tearing. Regular trimming or Dremeling of toenails, especially dewclaws, is critical before hunting season starts.

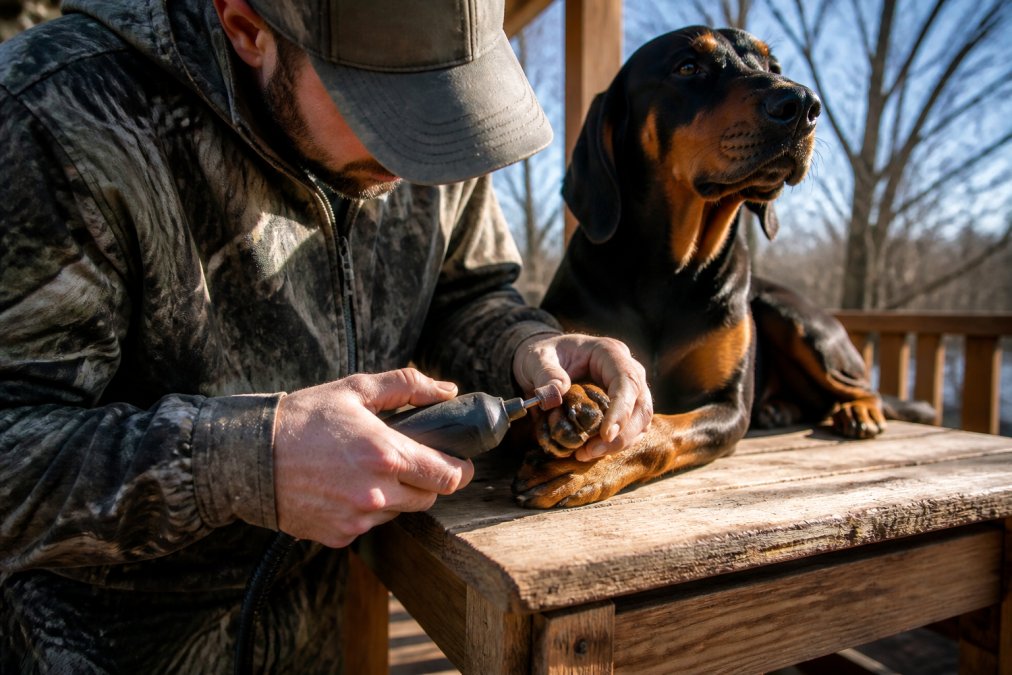
How to trim or dremel your dog's nails safely
Choose between clippers and a rotary grinder (Dremel). A grinder is faster and creates a smoother edge less likely to catch or split. Here's the safe process:
- Restrain your dog comfortably or use a grooming loop
- Identify the quick (the pink vein inside the nail), trim only the translucent part beyond it
- For clippers, trim at a 45-degree angle in small increments
- For a grinder, use short bursts and check progress frequently to avoid overheating the nail
- Work from the side of the nail, not straight down, to avoid cracking
- Trim until you see a small dot of pink in the center, that's your signal to stop
Trim every 4-6 weeks during off-season and every 2-3 weeks as hunting season approaches.
Dewclaw care before hunting season
Dewclaws are the small toes on the inside of the front legs. They don't touch the ground, so they grow long and catch on brush, thorns, and roots constantly during hunts. A torn dewclaw is incredibly painful and bleeds heavily.
Trim dewclaws shorter than regular nails, just slightly above the skin. Many hunters prefer to remove dewclaws surgically before the season starts, which eliminates the problem entirely. Talk to your vet about whether removal makes sense for your dog's hunting style.
Step 2: Build Toughness Through Hunting Dog Paw Pad Conditioning
Healthy feet are earned, not gifted. Dr. Seth Bynum, a veterinarian who works extensively with hunting dogs, explains: "Preventing paw injuries is not a passive process, and the hours you invest in strengthening your hunting dog's feet pay dividends later in the season. Just like fingertip calluses from playing guitar, a hunting dog's tough feet are a direct result of hours of conditioning, repetition, and preparation."
Conditioning isn't complicated, it's consistent, progressive exposure to varied terrain.
Gradual mileage increases and terrain matching
Start conditioning 8-10 weeks before hunting season. Begin with short walks on softer terrain: grass, dirt trails, and sandy areas. Increase duration by 10% each week, moving progressively to rougher surfaces. Match preseason surfaces to the terrain you'll actually hunt. If you're hunting in jagged shale country, spend those final weeks on shale. If it's cactus and sand, condition on sand.
- Weeks 1-2: Grass and dirt trails (20-30 minutes daily)
- Weeks 3-4: Mix in sandy areas and light rocky terrain (30-40 minutes daily)
- Weeks 5-6: Increase rocky terrain exposure, match your hunting terrain (45-60 minutes daily)
- Weeks 7-8: Full hunting terrain simulation, longer distances (60-90 minutes daily)
- Weeks 9-10: Maintain at hunting intensity
:::pro-tip A dog conditioned on smooth trails will bleed when you put them on jagged rock for the first time. Surface-specific conditioning is the difference between a dog that finishes strong and one that limps after day two. :::
Nutrition for pad and nail strength
Paw pad health starts from the inside. Quality protein, vitamin A, and omega-6 fatty acids are essential for healthy pad tissue and nail integrity. Prioritize foods with named meat proteins as the first ingredient. Add omega-3 supplements if your dog's diet is low in fish oil to reduce inflammation and improve skin resilience.
Step 3: Protect Paws with Balms and Booties
Even well-conditioned paws need protection from extreme conditions. Balms create a barrier against abrasive terrain, salt, ice, and heat. Booties offer additional protection when conditions are severe or when a dog has existing pad damage.
Choosing a Musher's Secret alternative balm
Paw balms work by creating a protective wax barrier that prevents direct contact between the pad and harsh surfaces. dogsRtreed's Paws R Protected all-natural balm is formulated specifically for hunting dogs in extreme conditions. Unlike some balms that soften pads too much, it maintains pad integrity while blocking moisture, salt, and abrasive particles. A single application lasts 30-45 minutes of active hunting before requiring reapplication.
Apply a thin coat to all pad surfaces after cleaning and drying. Reapply before long hunting sessions and immediately after washing.
When and how to fit dog boots correctly
Dog boots provide maximum protection but require proper fitting and a conditioning period. Fit boots 2-3 weeks before hunting season, not the day before. Start with short wearing periods, 15-20 minutes around the house, and gradually increase duration. The fit should be snug but not restrictive, you should fit one finger between the boot and the dog's leg. Boots are essential in cactus-heavy terrain, frozen marshes with sharp ice edges, extremely hot pavement, or when a dog has existing pad damage.
Step 4: Inspect and Clean Paws Before and After Every Hunt
A 2-minute tailgate check before and after every hunt catches small problems before they become major issues. This single habit prevents 80% of preventable pad injuries.
The 2-minute tailgate check
Before heading into the field, check all four paws for debris (dirt, gravel, foxtails, burrs) packed between pads, hot spots or redness, nail cracks or splits, existing cuts or lacerations, and webbing between toes for embedded thorns. Remove any debris with your fingers or tweezers. If you find a hot spot or minor cut, apply a protective balm before hunting.
After the hunt, perform the same check plus additional attention to areas showing stress. Look for new cuts or lacerations, swelling between toes, limping or reluctance to put weight on a leg, and excessive licking or chewing at paws.
Post-hunt washing and drying protocols
Wash paws thoroughly after every hunt. Dirt, salt, and plant debris trapped on pads can cause infections and slow healing of minor cuts. Use lukewarm water and gentle soap; avoid hot water, which can dry pads excessively. Pay special attention to webbing between toes and the creases where pads meet. Dry completely, including between toes. If your dog has any cuts, apply a protective balm or antiseptic after washing and drying.
Step 5: How to Heal Torn Dog Paw Pads in the Field
Sometimes injuries happen despite perfect preparation. A torn pad doesn't automatically end your hunt; it depends on the severity and how quickly you respond.
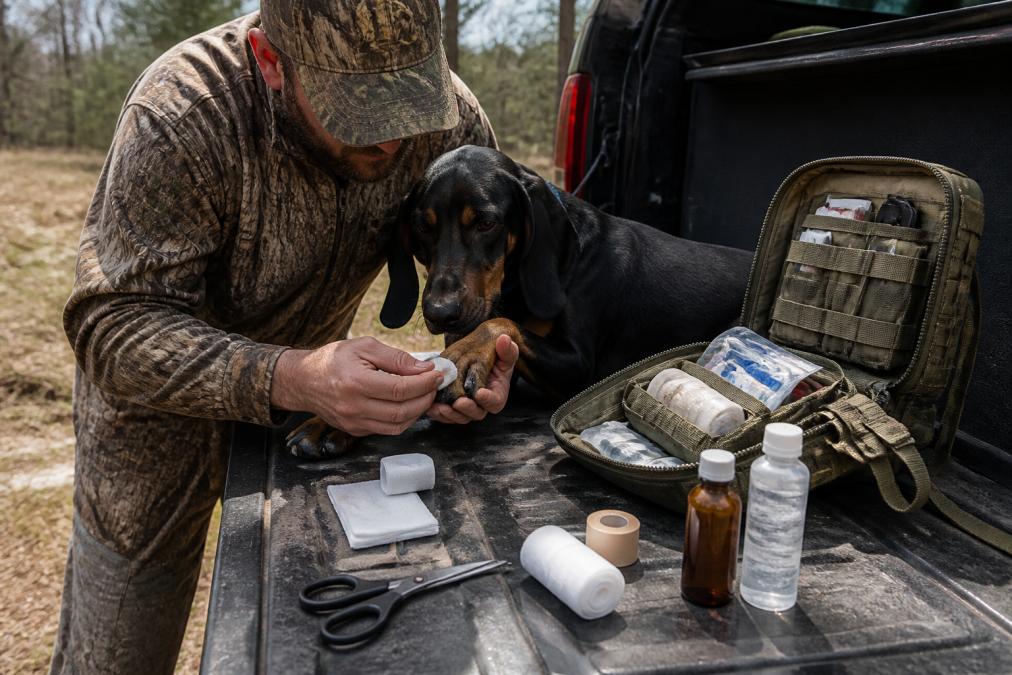
Emergency field repair with superglue and bandaging
Minor lacerations (partial-thickness cuts that don't bleed heavily) can often be managed in the field. For a small cut or hot spot that's bleeding lightly:
- Clean the area with clean water or antiseptic wipe
- Dry completely
- Apply a thin layer of superglue (cyanoacrylate) to seal the wound and stop minor bleeding
- Wrap the paw with athletic tape or self-adhesive bandage material
- Ensure the bandage is snug but not cutting off circulation
- Check the bandage every 2-3 hours for slipping or moisture
The superglue approach works as a temporary fix to allow continued hunting. For more serious lacerations (full-thickness cuts, heavy bleeding, or cuts longer than 1/4 inch), skip the field repair and head to the vet immediately.
When to stop hunting and seek veterinary care
Full-thickness pad lacerations have a 7.27 times greater risk for major short-term complications compared to partial-thickness cuts. Stop hunting immediately if you observe heavy bleeding that doesn't slow after 5 minutes of pressure, a cut deeper than the surface layer, swelling that's spreading up the leg, lameness that prevents weight-bearing, or signs of infection within 24 hours.
Step 6: Manage Weight and Monitor Gait for Injury Prevention
Overweight dogs experience more paw and pad injuries because extra weight increases impact force with every step. A dog carrying 20% excess weight experiences 40% more force on each paw strike.
Monitor your dog's body condition score year-round. You should feel ribs easily when you press gently on the sides, and see a visible waist when looking from above. Watch your dog's gait during conditioning and early hunts. A dog that's favoring a front leg or taking shorter steps with one paw is signaling pain or weakness. Address the problem immediately rather than pushing through.
Terrain-Specific Injury Profiles and Prevention Strategies
Different hunting environments create different injury patterns. Understanding terrain-specific risks helps you prepare appropriately.
Jagged shale and rocky terrain
Jagged shale and broken rock create the highest volume of pad injuries. Sharp edges cut deep, and the uneven surface causes dogs to step awkwardly, stressing ligaments and joints.
Prevention strategy: Condition heavily on similar terrain 6-8 weeks before hunting. Spend at least 30% of preseason conditioning time on shale or rocky ground. Use boots if your dog has any existing pad damage. Apply protective balm before each hunt. Inspect paws every 1-2 hours during hunts rather than waiting until the end of the day.
Desert cactus and thorns
Cactus spines and sharp plant material embed themselves in pads and webbing, causing puncture wounds and inflammation. These injuries are often invisible until infection develops days later.
Prevention strategy: Booties are nearly essential in heavy cactus country. Condition your dog in boots 3-4 weeks before hunting. Inspect paws multiple times daily, paying special attention to webbing between toes. Carry tweezers in your field pack to remove embedded thorns immediately. Wash paws thoroughly after each hunt and check for infection over the following days.
Hot pavement and summer conditions
When air temperature reaches 86°F, asphalt can reach 135°F. Your dog's paw pads can suffer heat damage in as little as 60 seconds on hot pavement. Use the "seven-second test": place the back of your hand on the surface for seven seconds. If you can't hold it comfortably, it's too hot for your dog's paws.
Prevention strategy: Hunt during cooler parts of the day. Use protective balm or boots on hot pavement. Avoid concrete and asphalt parking areas. Condition on natural terrain rather than hard surfaces during hot months. Provide frequent water breaks and monitor for signs of overheating.
Preventing dog paw pad injuries comes down to consistent preparation, regular inspection, and understanding your specific hunting environment. Start your preseason routine 8-10 weeks before hunting, maintain it throughout the season, and your dog will finish strong.
dogsRtreed's First-Aid Medical Field Pack gives you everything you need for field emergencies, and the Paws R Protected balm provides the protection your dog needs in extreme conditions. Combined with proper conditioning and daily inspection, these tools ensure your hunting partner stays healthy and ready for the entire season.

| Prevention Method | Timing | Frequency | Best For |
|---|---|---|---|
| Nail trimming | Year-round | Every 4-6 weeks | All dogs, especially before season |
| Paw pad conditioning | 8-10 weeks pre-season | Daily progressive | Building toughness for terrain |
| Protective balm application | Before hunts | Every 30-45 minutes | Extreme terrain, salt, heat |
| Boot conditioning | 3-4 weeks pre-season | Daily short sessions | Dogs with existing damage |
| Paw inspection | Before and after hunts | 2 minutes each time | Early problem detection |
| Post-hunt washing | After every hunt | Once daily | Infection prevention |
| Weight management | Year-round | Monthly monitoring | Reducing impact force |
Frequently Asked Questions
How do I toughen my dog's paw pads for hunting?
Start 6-8 weeks before hunting season by gradually increasing mileage on varied terrain. Begin with short walks on soft surfaces, then progress to rocky, uneven ground over several weeks. Match preseason training surfaces to the terrain where you'll hunt. A trotting dog's foot impacts the ground 120 times per minute, so consistent exposure builds natural calluses. Pair conditioning with proper nutrition (omega-3 fatty acids, vitamin A, quality protein) and regular nail trims to prevent gait changes that stress pads. Healthy feet are earned through repetition and preparation, not gifted.
What is the best paw wax for hunting dogs?
Look for a Musher's Secret alternative balm or all-natural paw protectant like pawsRprotected, which offers a 3-fold approach to pad health. These wax-based balms create a protective barrier against abrasive terrain, snow, salt, and extreme temperatures. Apply before hunts and reapply every 30 minutes on extended outings in harsh conditions. For heavy salt exposure or extreme cold, pH-buffered, season-specific options work better than general-purpose balms. Ensure any balm you choose doesn't soften pads excessively, you want protection without sacrificing the natural toughness your dog has built.
How do you treat a torn paw pad in the field?
For minor lacerations, clean the wound with water, apply pressure to stop bleeding, and use superglue to seal small cracks and pad tears temporarily. This field fix allows you to continue hunting while protecting the wound from debris. For deeper, full-thickness lacerations, bandage the pad firmly and consider ending the hunt to prevent complications. Studies show full-thickness pad lacerations are 7.27 times more likely to develop major short-term complications than partial-thickness injuries. Always carry a first-aid medical kit with sterile gauze, bandaging tape, and antibiotic ointment. Seek veterinary attention within 24 hours for any significant tear.
How often should I check my dog's paws while hunting?
Perform a quick 2-minute tailgate check before and after every hunt. Inspect pads, webbing, nail beds, and dewclaws for grit, hot spots, foxtails, burrs, and nail cracks. During longer hunts, stop every 2-3 hours to examine feet for early signs of injury. This early detection prevents minor issues from becoming season-ending injuries. Paw cuts and torn pads are the leading cause of field retirement for hunting dogs, so consistent monitoring is your best defense. Keep your dog's feet dry between hunts and watch for limping, licking, or reluctance to run, these signal pad distress.
This article was written using GrandRanker